- Dashboard
- General reports
- Closed loop
- Weighted mean widget
- Push metrics
- Share dashboard link
- Sentiment and root cause analysis
- NPS Benchmark
- Priority Matrix
- Heatmap Widget
- NPS
- Designing CX Dashboard
- Sentiment Analysis Details
- Share Dashboard
- Enable Dashboard on Portal
- Custom Metrics
- Survey Resting Period
- Custom Metrics - Grid Widget
- CX Dashboard Sorting
CX Auto Scheduler
Scheduler is another way to automate the transactions import and report export process. You need to provide the FTP details while scheduling the Import/Export feature. With the scheduler in place, CX will read the excel files to be imported and even send out the survey invite to imported transactions (only if you select to do so). You can even get the Raw Data or Dashboard exported at your FTP location periodically. You can also choose to get an email periodically instaed of getting the report on FTP server. Set the scheduler and wait for it to run. Apart from Raw data report, you can even get the report for Bounced, Delivered and Unsubscribed users.
- The Auto scheduler allows you to do the following:-
- Automate the transaction upload process.
- Automate the report exporting in PDF or Excel format.
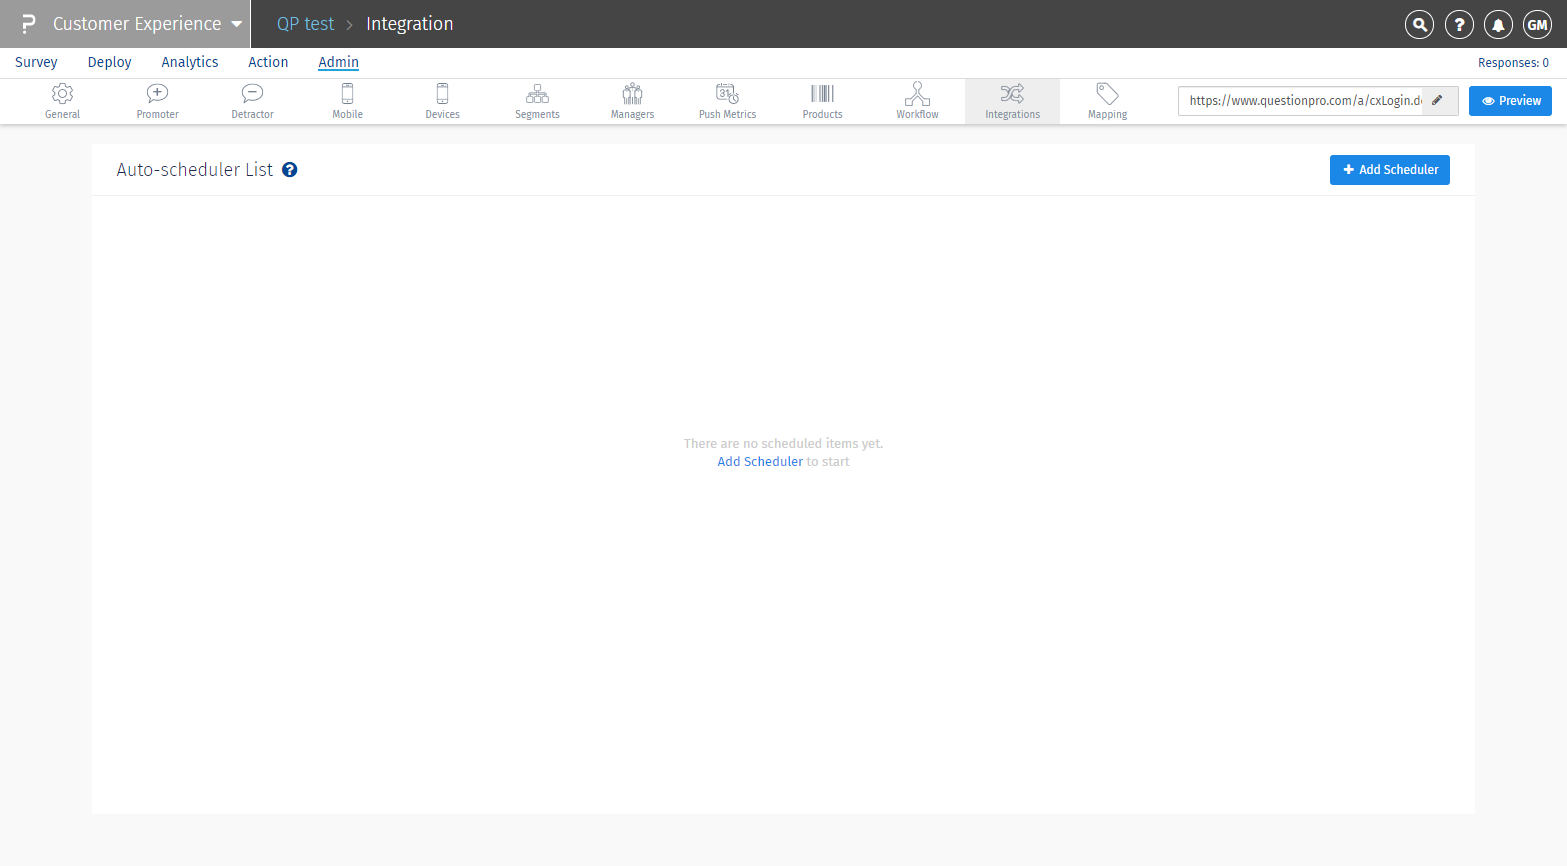
To set up the import, go to – Login >> Customer Experience >> Integration >> Scheduler
Click on Add Auto-scheduler button
Import Contact option is by default selected in the pop-up.The scheduler will run every hour to check if there is a file uploaded in the FTP location. If the file if found, it will import the records in CX

- Name: Give the name for the import event.
- Send Mode: If you want to send the survey invite immediately when the contacts are imported, select send mode as Email, SMS or Both. If you do not want to send the survey immediately, leave send mode to 'None'. It also shows the "Buy SMS credits" option if your account is out of credits
- Survey: Select the survey for which the survey invite has to be sent to the contacts.
- Language: Select the language in which you want the survey to open for the end user.
- Email Template: Select the template to be sent in the survey invite to the imported contacts.
From the FTP connection details:
- If you are using SFTP, make sure to switch on the Secure FTP toggle.
- Set up the FTP details and click on Create Scheduler Event to create the Import Contacts scheduler.
After creating the FTP scheduler, you need to upload the sample contact file in the FTP location.
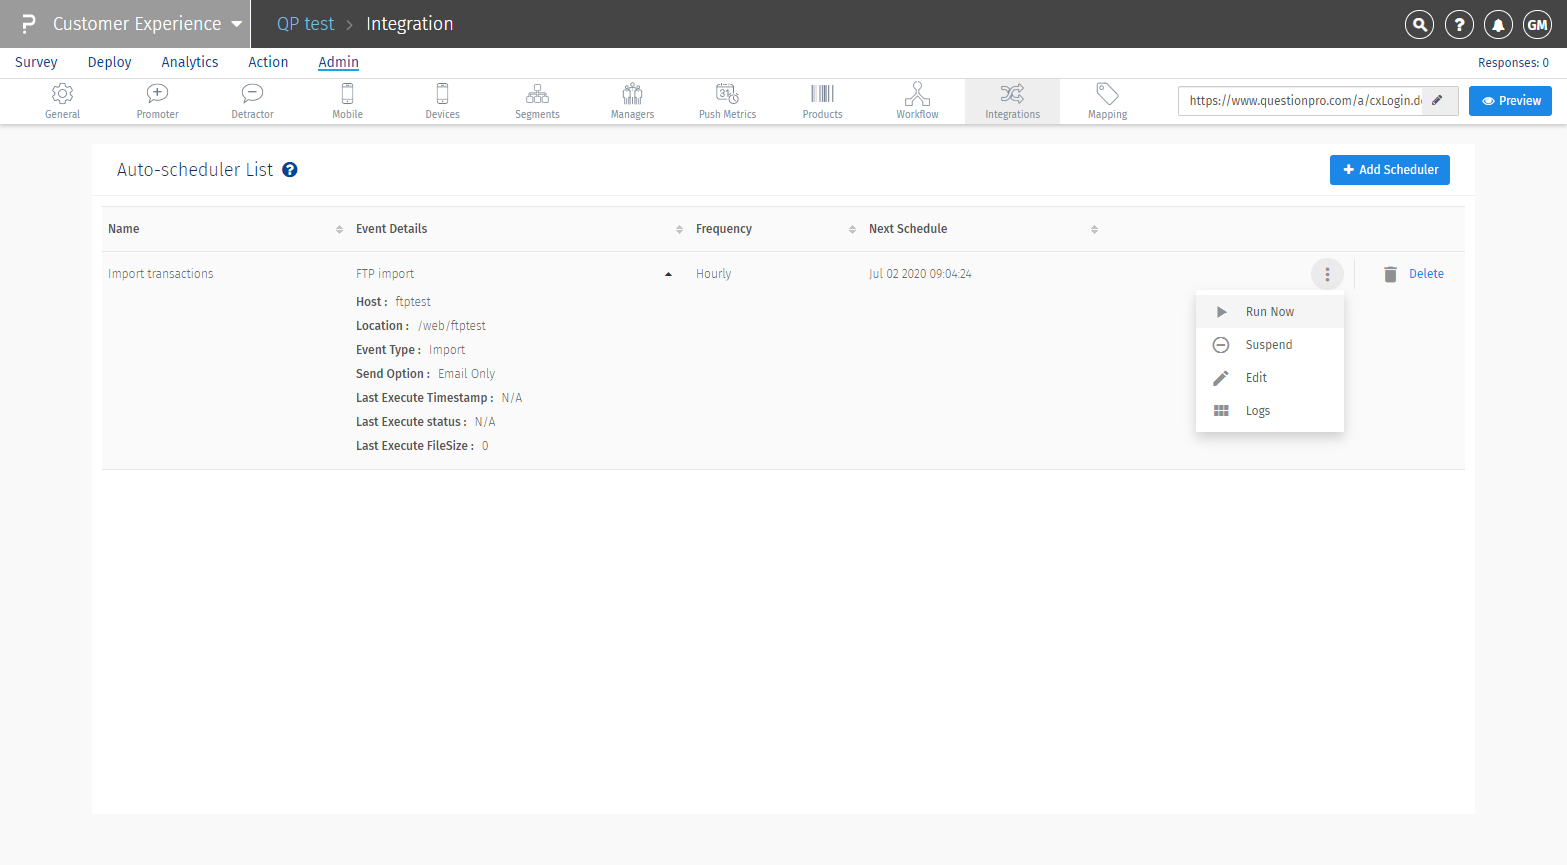
After uploading the sample contact file in the FTP location, you can click on 'Run Now' to test the connection.
If the connection is successful, the system will import the contacts from the sample contact file and delete the file from the FTP location.
No, there is no specific naming convention in the the contact file needs to be uploaded.
Only make sure the data in the contact file is in the same format as of the sample contact file.
You can upload n number of files in the FTP location at a time. The scheduler will read each file one by one and import the contact from the file.
No, QuestionPro doesn't keep a copy of your files.
Once the system processes the file(s) from the FTP location and upload the contact details, it deletes the file from the location.
Yes, logs are created with the details of file name processed and imported in the system. In addition, it consists of number of records processed in the file.
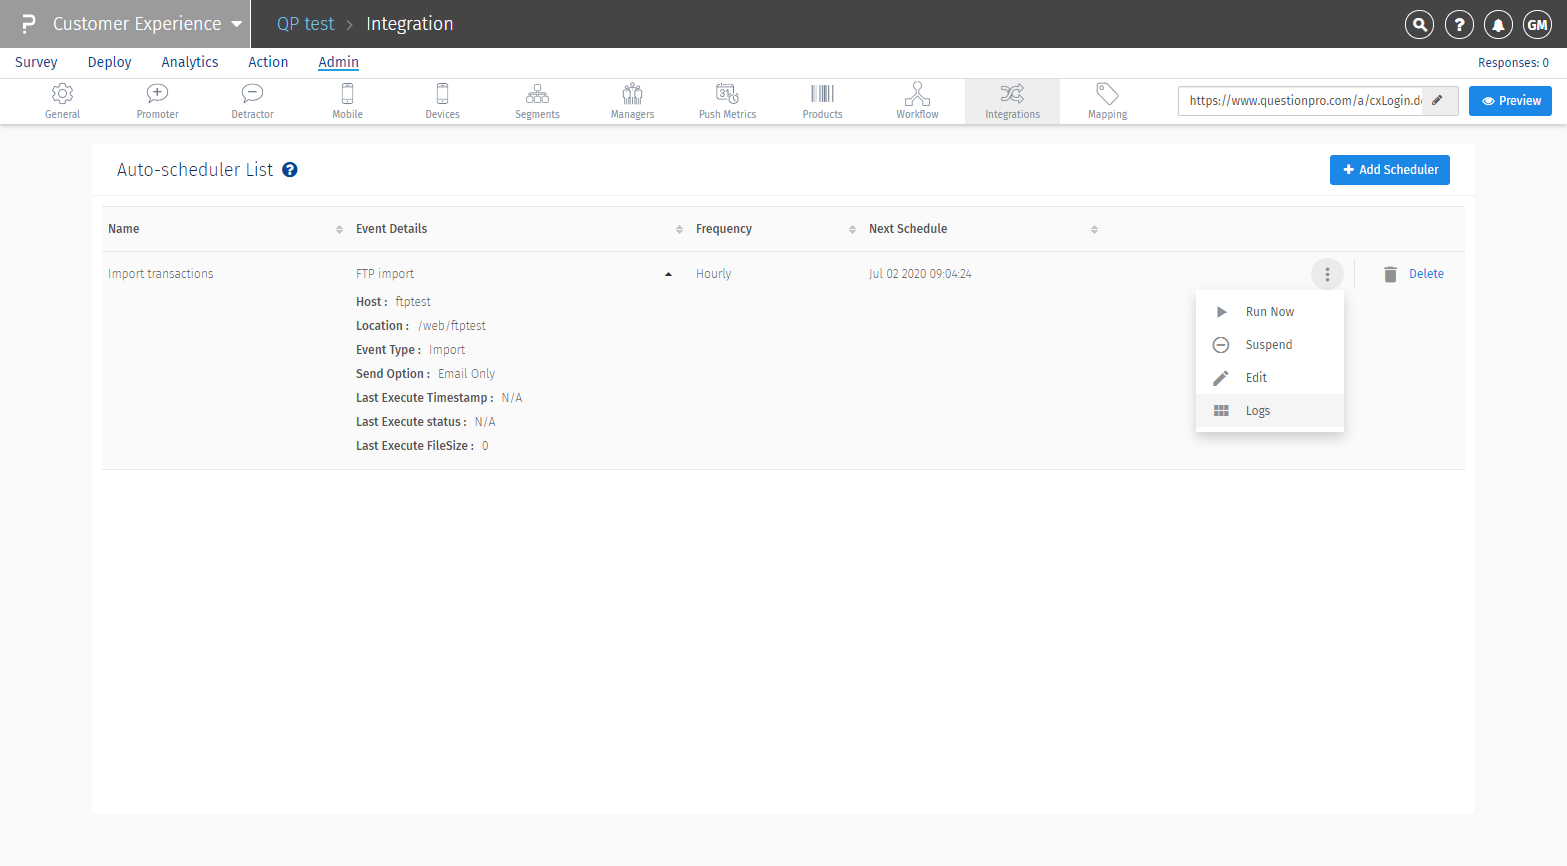
You can view the logs, by clicking on the Logs under the Action tag besides each of scheduler.
After the transaction file is processed, the bad/invalid transactions are shared on the same FTP location in an Excel file. You can pick the file from there. Also, if any such file remains on FTP location, it will not get imported back in the system.
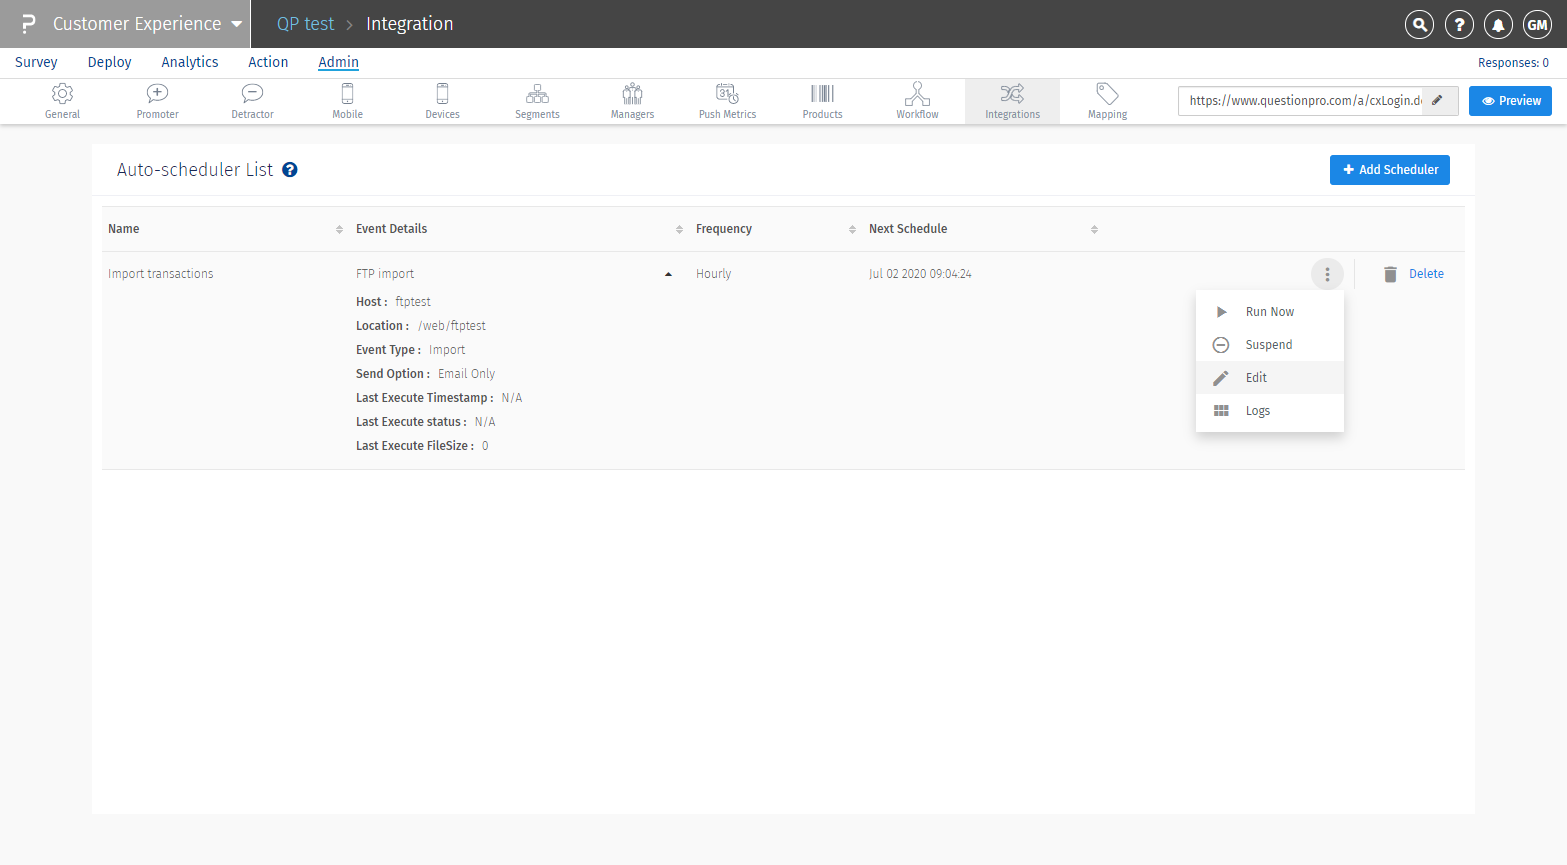
Yes, you can edit the scheduler and make changes to it.
To edit the scheduler, click on Edit and make the changes you want in the scheduler.
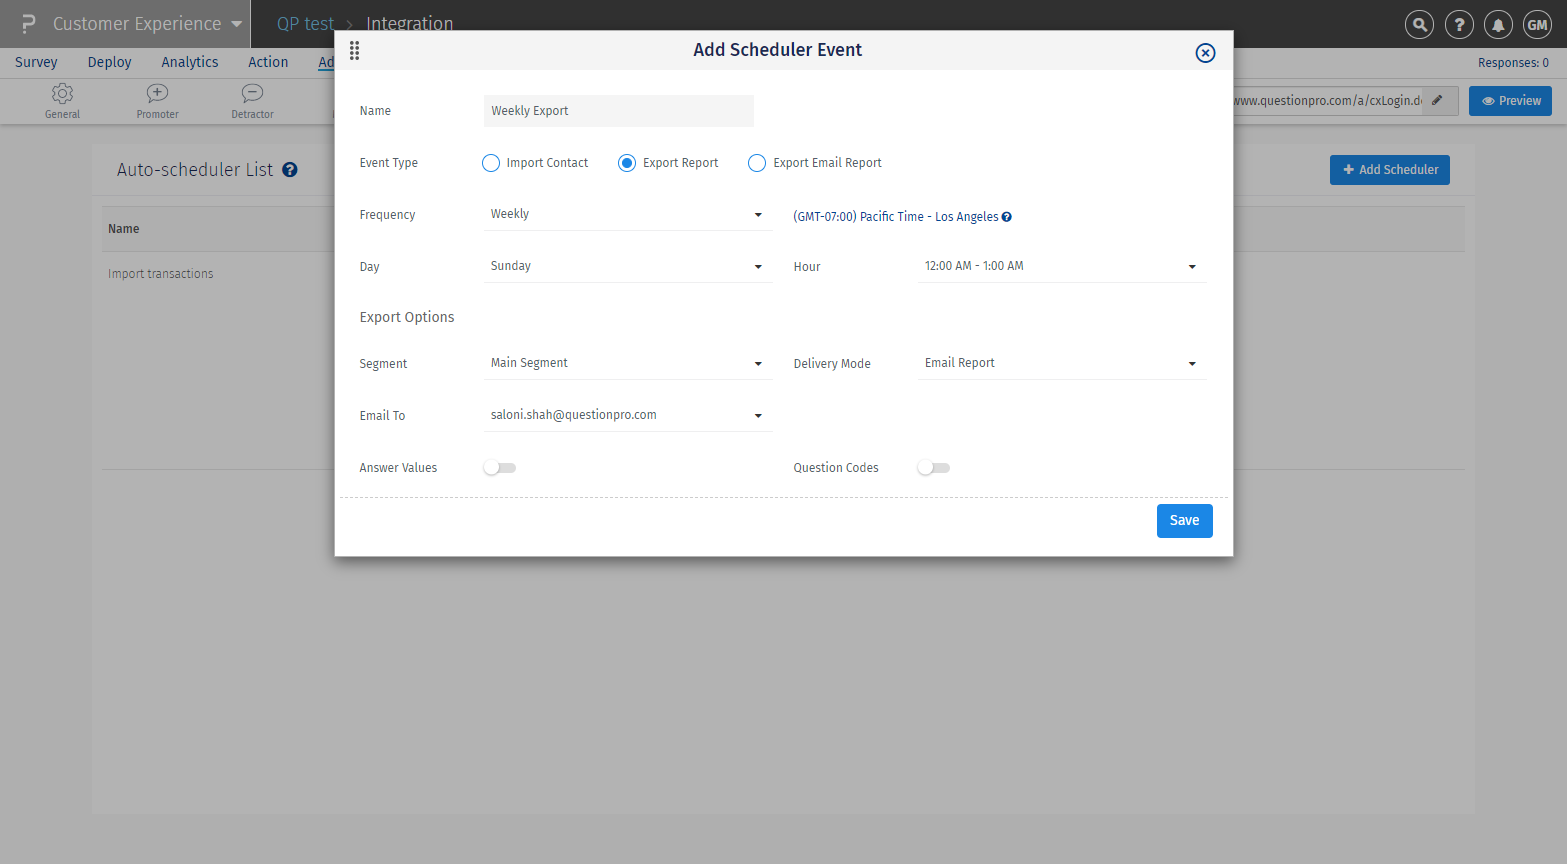
In the Pop-up, select Export Report radio button.
- Name: Give the name for Export event.
- Frequency: Select when you would like to export the report to your FTP location. You can select either weekly or daily option from the drop down.
- Day: Select a day on which you would like to export the report.
- Hour: Select the time at which you would like to export the report.
- If you select Daily option, the report will be uploaded to your FTP location at 12:00 AM PST.
From the Export options, use the following:
- Segment: Select the segment for which you need to export the report.
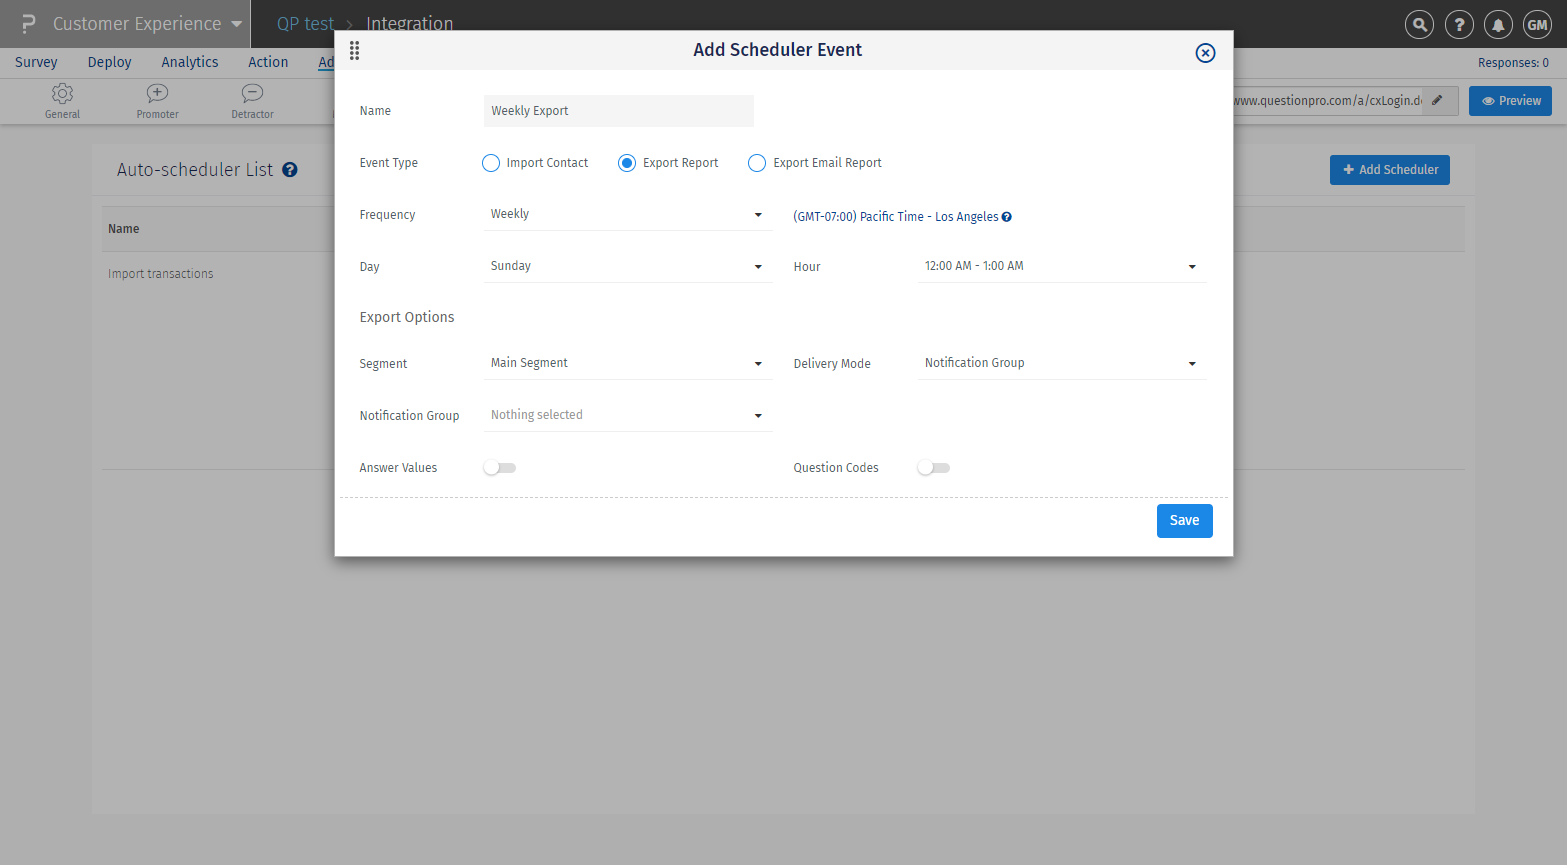
- Delivery mode: You can export the raw data report in 3 ways:
- FTP upload: File gets uploaded to specified FTP location
 Give your FTP connection details and click Create Scheduler Event button to create export scheduler. The scheduler will export the raw data excel in the export FTP location.
 - Email report: File gets emailed to any 1 account admin in the organization

- Notification group: File gets emailed to a group of people who are added in a notification group

- FTP upload: File gets uploaded to specified FTP location
- Display Answer Values : To get the answer values in the excel sheet.
- Display Question Codes: To get the question codes in the excel sheet.
In the Pop-up select, Export Email Report radio button.
- Name: Give the name for Export event.
- Frequency: This is set by default to 'daily'.
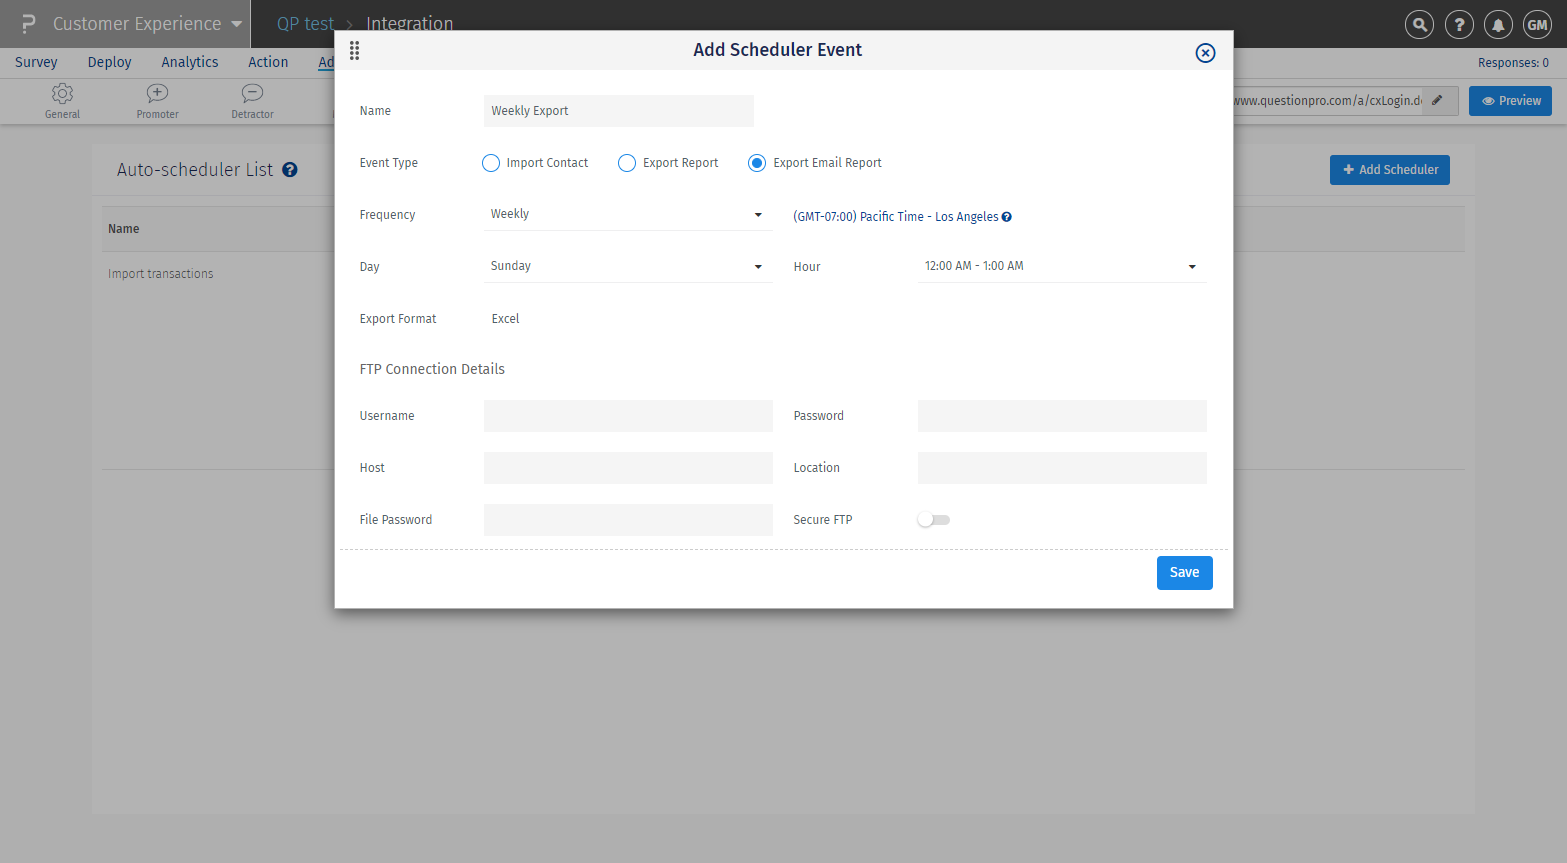 Give your FTP connection details and click Create Scheduler Event button to create export scheduler. The scheduler will export the email engagement excel report in the export FTP location.


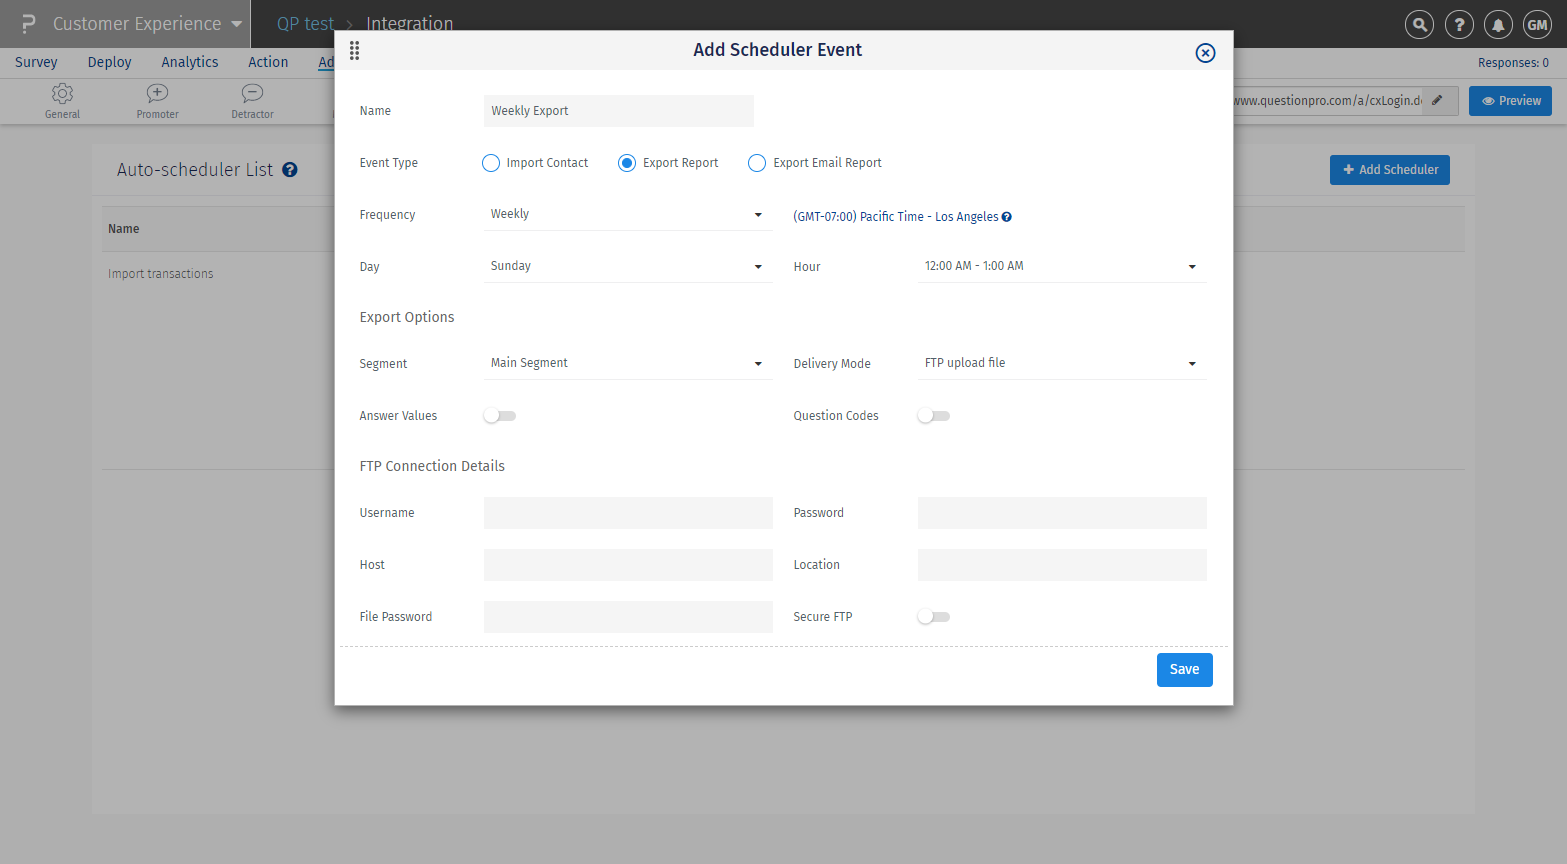 Give your FTP connection details and click Create Scheduler Event button to create export scheduler. The scheduler will export the raw data excel in the export FTP location.