
- Dashboard
- General reports
- Closed loop
- Weighted mean widget
- Push metrics
- Share dashboard link
- Sentiment and root cause analysis
- NPS Benchmark
- Priority Matrix
- Heatmap Widget
- NPS
- Designing CX Dashboard
- Sentiment Analysis Details
- Share Dashboard
- Enable Dashboard on Portal
- Custom Metrics
- Survey Resting Period
- Custom Metrics - Grid Widget
- CX Dashboard Sorting
CX - Create Email Survey
To create an e-mail survey, follow the steps below:
- Login and go to Customer Experience
- Click on Create Survey button

- Select the Email option from the Survey Type pop-up

- Give the survey name and click on Add Survey button
- It will open the survey and one default NPS question will be added to it. You can edit the question and can even add more questions.

Once a survey gets created, the system automatically adds a NPS question to it. The settings to the NPS score are also automatically assigned. The system also adds action alert under ‘Notification’ tab for the detractor tickets.
After adding more questions to the survey if you want to change the NPS question or want to add more action alerts for detractor tickets, you can do the same.
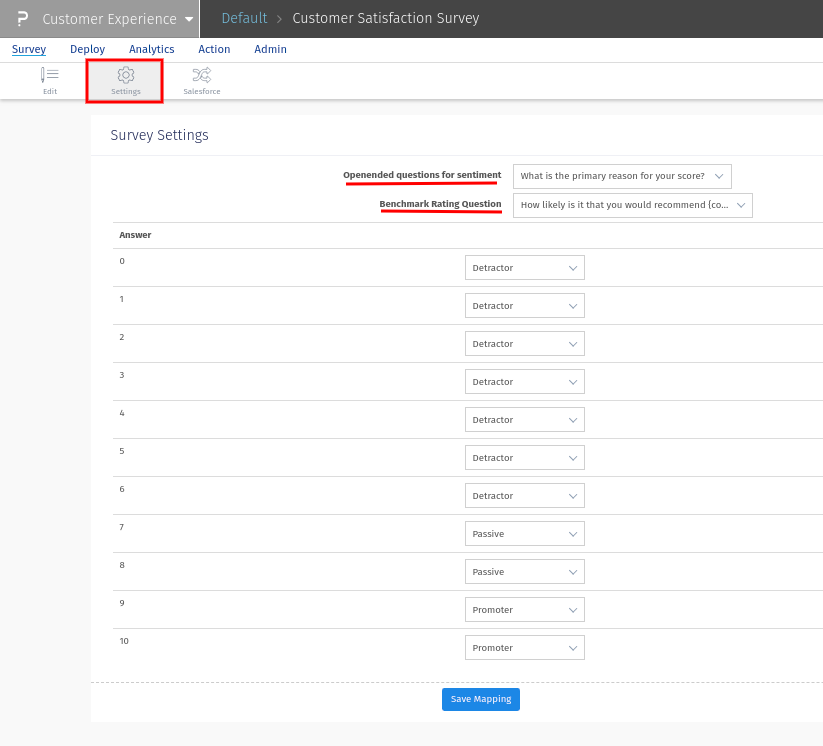
To configure the NPS questions and Open ended question (Comment box), you need to do the following:
- Click on Settings
- In the Open ended Question for Sentiment drop down, all the open ended questions will be visible.
- You can select any one of those for the Sentiment Analysis in CX Dashboard.
- Similarly, in the Benchmark Rating Question drop down, all the NPS questions added in the survey will be visible here. You can select any NPS question and set the Detractor, Passive and Promoter criteria.
- Click on Save Setting button
To configure the Detractor Alerts, you need to do the following:
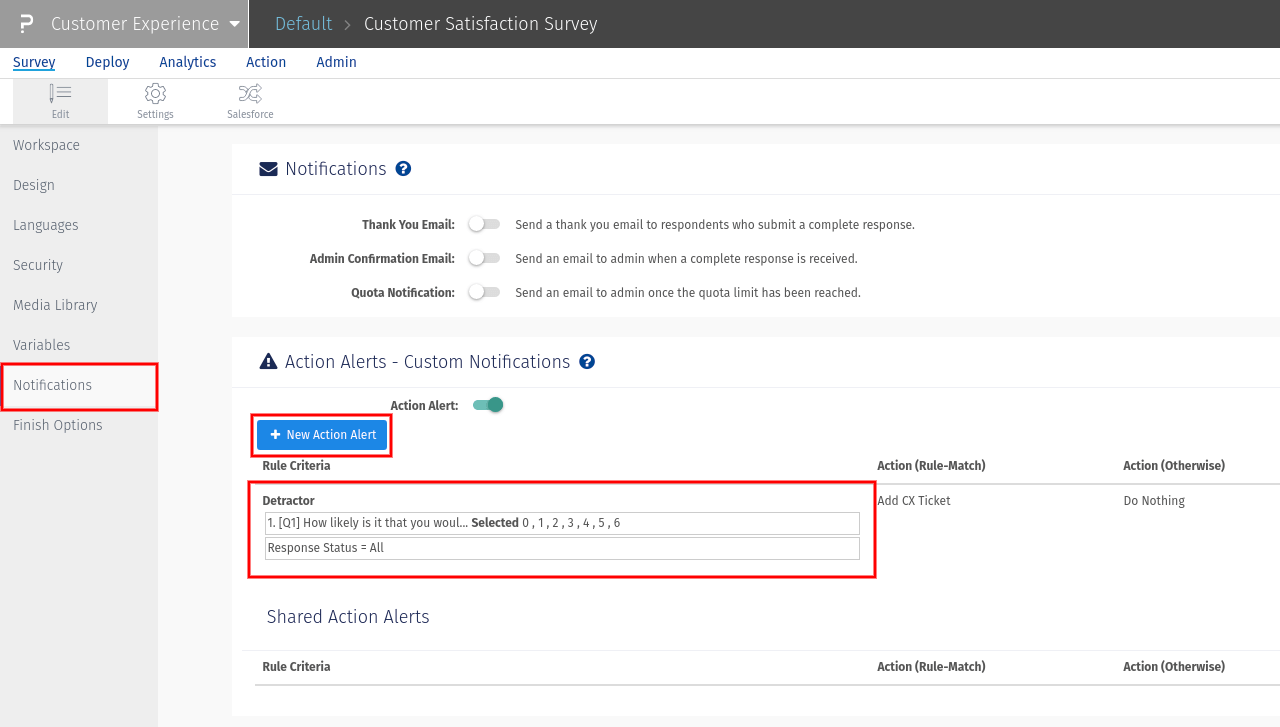
- Click on Notifications
- One action alert for the default NPS question will be visible on the page
- To create a new action alert, click New Action Alert button
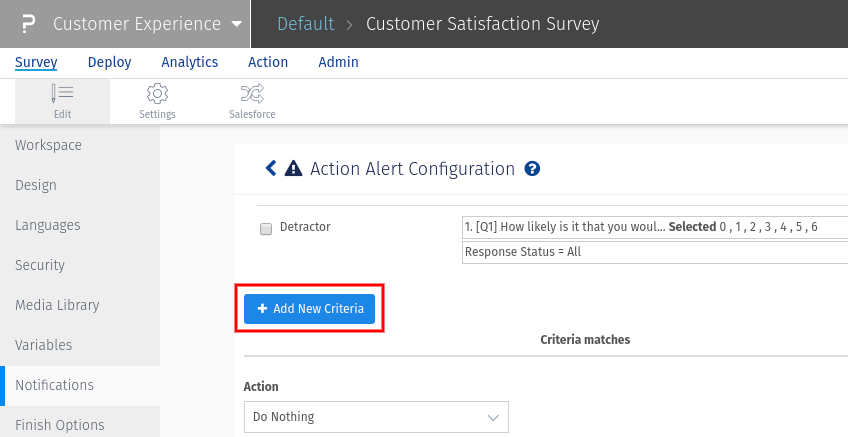
- Click on Add New Criteria button to create a new criteria for the detractor ticket generation
- Give the name to the criteria, click on Responses to Survey Question
- Select a survey question and in the drop down next to the question, select the values for which you need to create Detractor Ticket (In the example image, we have used NPS question)
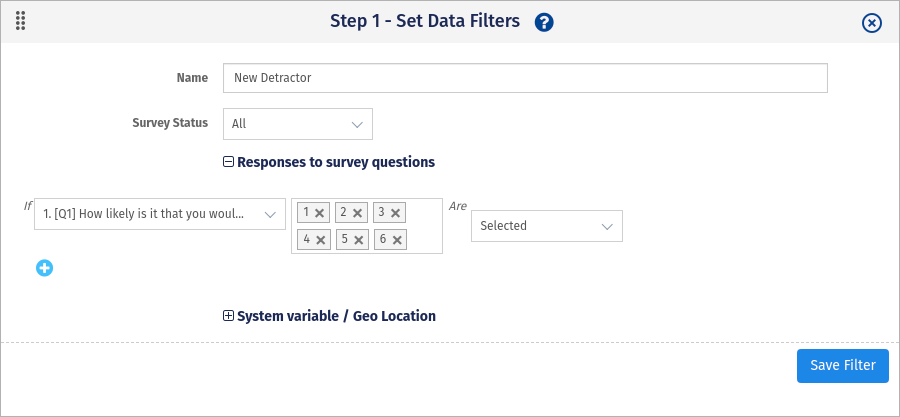
- Click on Save Filter button, it will take you to the previous screen
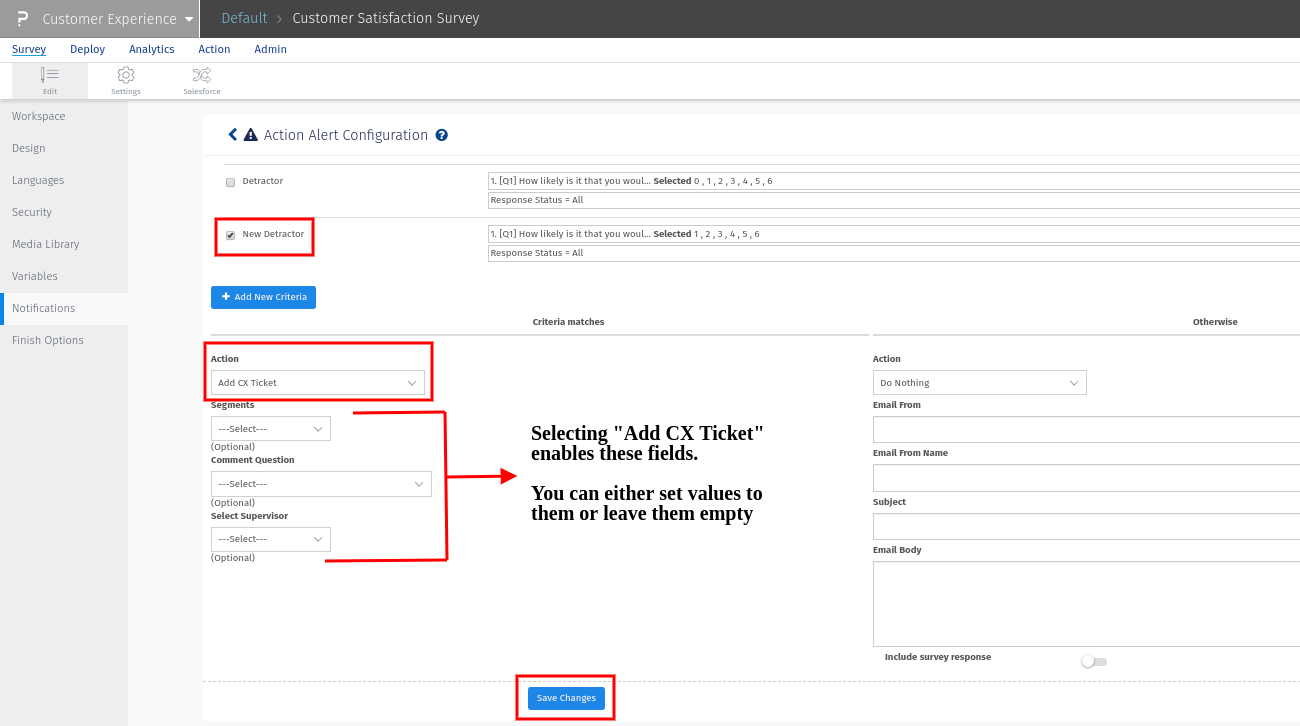
- Select the newly created action criteria by clicking the checkbox besides it
- From the Action section, select the Add CX Ticket from the first drop down
- After selecting ‘Add CX Ticket’ three more fields will be activated, namely Business Units, Comment Question and Select Supervisor. If you want to assign ticket to specific place, person you can set these criteria or you can leave them blank.
- Click Save Changes button to save the action alert mapping for detractors
Once you have created and configured your survey, you need to import transactions. Click on Business Data and go to Transactions to import transaction data. Refer the Transaction help file for details.
After importing transaction click on Deploy to send the email survey to the transactions imported. Refer the Deploy help file for details.

